 Another beautiful treasury, for your Easter pleasure. Full of eggs for fertility! Happy Spring!
Sunday, April 12, 2009
Featured by the Lovely LocalColorist...
Another beautiful treasury, for your Easter pleasure. Full of eggs for fertility! Happy Spring!


Monday, March 30, 2009

Tuesday, December 9, 2008
Tapestry Mosaic Coffee Table
 The inspiration - a tapestry that my mom picked up on
the streets of Thamel in Kathmandu, Nepal.
I started with the tapestry that hangs on the wall behind our sofa. I knew that I wanted the mosaic to mirror the quilt, but I wasn't sure of the exact design. So, first I started by cutting many, many little pieces of glass in the colors that I wanted to use. Then, I was able to rearrange them, like a puzzle, until the design was just right.
The Process:

Using No Days Glaze mosaic adhesive and a heat gun, I was able to work one section of the mosaic at a time. The No Days Glaze is incredibly convenient. It comes in packages of several rubbery-plastic-like sheets. You lay a sheet down on the surface you are mosaic-ing, place the glass pieces down (and move them around), and fire up the heat gun (on low) until the pieces are hot and the adhesive melts into place. This step is tricky. You want the adhesive to melt, but if you don't heat the glass up enough, the glass will pop off when grouting. Also, if you heat the glass too long, it will start swimming around on the glaze. Then, you end up chasing each piece back into place (with a pair of tweezers, or a pencil tip, and NOT your fingers - the glass is HOT!).
After several days and plenty of movies (a Harry Potter-a-thon and a terrible Indiana Jones and the Crystal Skull), I had all of the pieces adhered to the surface of the table, and was waiting for a free day to allow me to start and finish the grouting process.

 A dirty job, but I was excited to get it over with....and to let it dry so I could polish it to the beautiful and intricate table that it is:
Oh! And I finished it just in time to enter the "It Pays" to use No Days Glaze Mosaic Contest!!
They have started another challenge for 2009, as well! So, if you'd like to try your hand at the mosaic adhesive, enter your project for a chance to win $250!!
They have started another challenge for 2009, as well! So, if you'd like to try your hand at the mosaic adhesive, enter your project for a chance to win $250!!
Thursday, November 6, 2008
Incompatible...Glass, that is....
I've been meaning to take and post these pictures for quite awhile, now. So, don't fret yourself by thinking that my gorgeous blue and orange ribbon stitched quilted plate has suddenly shattered!
No, this plate is the first generation plate; the one made entirely of scrap glass, and because of that, alas, I found some incompatible glass laying in the wrong bins at the studio. However, this "unfortunate" incident lends itself nicely to a fabulous learning experience.
Many beginners to glass fusing ask if they can use old stained glass scrap that they've got lying around. The broad answer to that question is "No" due to reasons of incompatibility. You see, glass that has been specifically formulated for fusing "plays nicely" only with other glasses that have also been specifically formulated in the same way. The label "COE," or "Coefficient of Expansion," is the general term that describes the rate in which glass expands and contracts upon heating and cooling. If you are using two glasses that have different COEs for fusing purposes, then your final result will end up looking similar to my lovely sample plate. (Again, the COE will generally get you through the long explanation, but if you want all the juicy details of compatibility, check out TechNotes 3: Compatibility of Glasses from Bullseye.)

However, you may not have a disaster like this the first time out of the kiln! For reasons best left to the Glass Gods, this particular plate did not crack until after it's second time out of the kiln. Only when I was engraving the bottom of the plate did it "pop" in two cracks diagonally down the middle. Initially, I thought it was my engraving that broke the plate.
So, I put the plate back in the kiln to fuse it back together at a full fuse, once again. Fortunately, the third time out of the kiln was a total crack up, around each and every one of the orange pieces, allaying my guilt at having cracked my plate upon engraving.

So, what happened?!? By looking at the slivers that have formed in circles surrounding almost each and every piece of orange glass, we can be suspicious that this glass is not compatible, which all of the other glass that I was using happens to be. In other words, the rate at which the orange glass contracted upon cooling was slower than the rate at which the rest of the glass contracted. As the glass became less fluid, the only way for it to get rid of all the stress building up inside was to crack!
Tuesday, November 4, 2008
I Do!

Well, it's official! We tied the knot. In a low key, almost spontaneous wedding ceremony at the "Silverado Tiki Bar" in Napa, CA, my wonderful, thoughtful, caring fiance, Todd, became my beloved husband! He is so eloquent with words that I am left almost speechless. I'm sure he knows how much I appreciate and depend upon him and the support that he gives in all of my endeavors. He puts up with all of my piles and loose organization and lately lacking housekeeping skills. He is just too wonderful for words and I love him dearly.
Thursday, October 9, 2008
I Blew It!

My very first solo attempts at making a blown glass pumpkin. A super mini-sized pumpkin, whose introduction to the world was doomed from the beginning...
It cracked as I added the too-hot stem, which was also too much glass for the tiny little pumpkin. So, after my feeble attempt at pumpkin-making (a good exercise in heat management and the dynamics of the whole process), we moved on to flower pulling. Again, a feeble attempt. My "flowers" were another great exercise in heat management. I need to be a bit quicker in pulling and turning the petals to give the flower some depth. Basically, I've got the idea and I just need to perfect the technique.
On a very positive note, we found the crucial point in the process where my pumpkin stems were falling apart. Saint Helena glass artist, Ed Breed is blowing the pumpkins while I prep the stem (gather glass, add color, heat and go into the mold) to finish them off. Unfortunately, the last few days have been Ed working overtime, both blowing the pumpkin and then finishing the stem, because I couldn't get my heat just right. So, yesterday we walked through the process and pinpointed the glitch. Hopefully, from this point forward, the stems will now be finished by me, perfectly!

Monday, September 29, 2008
Fingerpainting...
In researching finger painting and techniques in a prelude to my K-2 afterschool art class, I came upon some rather interesting sites that shed a whole new light upon the finger painting process.
At "Another Look at Finger Painting," finger painter Mary Ann Brandt gives a fresh perspective on the ancient art of finger painting (prehistoric cave paintings and Chinese calligraphic finger paintings on rice paper) and let's you know how you can do it On Your Own.
Artist Allen Montague painting a Monet-style waterlily scene, with fingers.
In the background, a compelling series of videos at chrismartenson.com, makes me want to learn to make my own natural paints. This site is a start, by using what I've got in the kitchen, there are recipes for making a couple of different mediums: finger paints, play dough, silly putty and ice cream. But what I'd really like to use are natural, local pigments...perhaps grape skins? clay?
Further reading about finger painting with Ruth Faison Shaw, who developed institutional therapeutic finger painting, after teaching the art of painting to children using finger paints.
Below, BackPorchArt William Boyer has created a series of finger paintings viewable at WebShots.

From my reading, it seems that most finger painted art starts with a blank canvas (obviously), and paint is poured directly onto the canvas. The paint is then moved around with fingers. There is another method, demonstrated by wonderboy, below:
I had not even conceived of the pointillist technique in regards to finger painting, but it seems rather obvious in retrospect.
More links...
Cave Painting - making your own paint from dirt and shortening
Tons of Homemade Paint Recipes - shaving cream, soap flakes, food coloring, oh my!
More and More and More Paint Recipes - yowsah! Paint, dye, and Ink Recipes.
Elementary Lesson Plan Combining Finger Painted Paper and Collage
Screen Printing with Finger Paints
Glues, Brews and Goos - Google Book Search is amazing! This book looks fabulous!
Liquid Starch Recipe - from Field Trips in Fiber, a quilter's blog:)
From Painting: It's the Process, Not the Product! by By MaryAnn F. Kohl, Katheryn Davis : 1/4 cup (60mL) liquid starch and 1 T (15mL) tempera paint and stir.
A bit unrelated, Keith Haring Art Curriculum projects
Of course, I can't forget a favorite of mine, Ivan Chan:)
At "Another Look at Finger Painting," finger painter Mary Ann Brandt gives a fresh perspective on the ancient art of finger painting (prehistoric cave paintings and Chinese calligraphic finger paintings on rice paper) and let's you know how you can do it On Your Own.
Artist Allen Montague painting a Monet-style waterlily scene, with fingers.
In the background, a compelling series of videos at chrismartenson.com, makes me want to learn to make my own natural paints. This site is a start, by using what I've got in the kitchen, there are recipes for making a couple of different mediums: finger paints, play dough, silly putty and ice cream. But what I'd really like to use are natural, local pigments...perhaps grape skins? clay?
Further reading about finger painting with Ruth Faison Shaw, who developed institutional therapeutic finger painting, after teaching the art of painting to children using finger paints.
Below, BackPorchArt William Boyer has created a series of finger paintings viewable at WebShots.
From my reading, it seems that most finger painted art starts with a blank canvas (obviously), and paint is poured directly onto the canvas. The paint is then moved around with fingers. There is another method, demonstrated by wonderboy, below:
I had not even conceived of the pointillist technique in regards to finger painting, but it seems rather obvious in retrospect.
More links...
Cave Painting - making your own paint from dirt and shortening
Tons of Homemade Paint Recipes - shaving cream, soap flakes, food coloring, oh my!
More and More and More Paint Recipes - yowsah! Paint, dye, and Ink Recipes.
Elementary Lesson Plan Combining Finger Painted Paper and Collage
Screen Printing with Finger Paints
Glues, Brews and Goos - Google Book Search is amazing! This book looks fabulous!
Liquid Starch Recipe - from Field Trips in Fiber, a quilter's blog:)
From Painting: It's the Process, Not the Product! by By MaryAnn F. Kohl, Katheryn Davis : 1/4 cup (60mL) liquid starch and 1 T (15mL) tempera paint and stir.
A bit unrelated, Keith Haring Art Curriculum projects
Of course, I can't forget a favorite of mine, Ivan Chan:)
Thursday, September 25, 2008
Mini Mosaic Presentation...
It's the end of my four week session with the Ms. Brown's first grade class. We've finished our mosaic tiles and our "Making Learning Visible" books that accompany the project. Here's my presentation using Google docs (which I do like a lot!) that helps to fill in even more visual content standards for the project.
Friday, August 29, 2008
What happened?!? Stressed Out!

Voila!! I had recently set my Tree of Life fused glass plate aside, adding it to the pile that I had yet to photograph. I really love the aventurine green with the iridescent amber and swirly opal green/white glass. The colors are beautiful, reminiscent of summer, and make me want to do an entire series of winter, spring, summer and fall tree plates.
However....

when my wonderful fiance was tidying the house (and organizing my piles, he really is incredibly sweet), he noticed this crack in the plate. Now, I don't know if it's the weather, or if it's just that time in my life when I get to learn about stress and glass, but instead of throwing the blame on him (He must've dropped something on it, right?), I somehow knew that I had another stress case!
But, how exactly would I know? It surely doesn't look like a case of incompatible glass. Look at that S-curve that doesn't follow any seams. It runs right through the middle of at least three pieces of glass (which are all different colors). Reference this link for a wonderfully, hideous picture of incompatible glass.
Aha! My first chance to use the polarizing lenses that have been sitting in the studio, just waiting to confirm my suspicions... Whoa, Nelly!! Just look at that stress!!! I've been told that after a stress break, you can no longer see the stress halo when the piece is placed between the polarized lenses. Well, if that's true, then just imagine the halo that was apparent before this fracture.
So, what to do now? I'm going to put my poor little tree back in the kiln. Yup, throwing her back in. I'm gonna slowly go up to 1250 F and bring down the edges, then go up to 1480 F again to fuse the crack back together. But, this time, I'm slowing down the annealing schedule and holding for a bit longer, because that, I think was the culprit. I used the smaller kiln (Paragon Fusion7), and did not hold my poor plate at 1050 F for long enough.
Hopefully, that will solve my problem, 'cuz I'm getting tired of seeing breaks:(
But, how exactly would I know? It surely doesn't look like a case of incompatible glass. Look at that S-curve that doesn't follow any seams. It runs right through the middle of at least three pieces of glass (which are all different colors). Reference this link for a wonderfully, hideous picture of incompatible glass.
Aha! My first chance to use the polarizing lenses that have been sitting in the studio, just waiting to confirm my suspicions...
 Whoa, Nelly!! Just look at that stress!!! I've been told that after a stress break, you can no longer see the stress halo when the piece is placed between the polarized lenses. Well, if that's true, then just imagine the halo that was apparent before this fracture.
So, what to do now? I'm going to put my poor little tree back in the kiln. Yup, throwing her back in. I'm gonna slowly go up to 1250 F and bring down the edges, then go up to 1480 F again to fuse the crack back together. But, this time, I'm slowing down the annealing schedule and holding for a bit longer, because that, I think was the culprit. I used the smaller kiln (Paragon Fusion7), and did not hold my poor plate at 1050 F for long enough.
Hopefully, that will solve my problem, 'cuz I'm getting tired of seeing breaks:(
Friday, August 15, 2008
Welcome Nipper!
On Wednesday, I met with Cher Church of TalentedLady.etsy.com at Maya in Sonoma for the monumental transfer of Nipper Kilnwash, the CGGE (Creative Glass Guild of Etsy) Traveling Mascot. Nipper is part of the Travel Kitty Project, and as a team mascot, he is building relationships within the group. Honestly, I think this is the most exciting thing I've done with the CGGE!
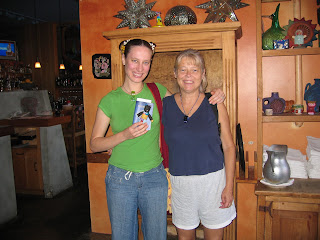 It was really a pleasure meeting Cher, and we shared our life stories in just under two hours:)
And now, Nipper is just in time to catch the excitement of the Annual Summer Sale at Mitcavish Studios. I'll get to show him around to all my local glass pals and maybe we'll get out to do some winetasting, as well!
 It was really a pleasure meeting Cher, and we shared our life stories in just under two hours:)
And now, Nipper is just in time to catch the excitement of the Annual Summer Sale at Mitcavish Studios. I'll get to show him around to all my local glass pals and maybe we'll get out to do some winetasting, as well!
Monday, July 7, 2008
Kate Wolf Festival - Laytonville, CA
I had a fabulous mini-vacation this past week and a half, and it feels like I was gone for a month!
My dad's visiting my fiance and I in his RV, so we took a trip up north to Mendocino County to the Kate Wolf Folk Music Festival. My uncle was even able to make the trip out, and we picked him up in Santa Rosa on the way!
A few of my faves:
It was very smoky for the first few days, but thanks to some hard working volunteer firemen and cooperative coastal fog, Sunday was sunny and clear. I had tons of fun hanging out with family and friends, dancin' and hula-in' the days away!
My dad's visiting my fiance and I in his RV, so we took a trip up north to Mendocino County to the Kate Wolf Folk Music Festival. My uncle was even able to make the trip out, and we picked him up in Santa Rosa on the way!
A few of my faves:
It was very smoky for the first few days, but thanks to some hard working volunteer firemen and cooperative coastal fog, Sunday was sunny and clear. I had tons of fun hanging out with family and friends, dancin' and hula-in' the days away!
Friday, May 16, 2008
My 20 minutes of Morning Yoga
Recently, I've motivated myself to routinely practicing yoga in the morning, rationalizing that if I have three hours to play Solitaire (yes, I got a bit hooked one day), then I certainly have 20 minutes to squeeze in some yoga. Imagine if I had filled the entire three hours with yoga! (I guess that will be my next goal!)
So, with that in mind, I present to you my morning workout with Jason Crandell...
So, with that in mind, I present to you my morning workout with Jason Crandell...
Thursday, May 1, 2008
"Maya Star" Fused Glass Quilt Plate

My newest "quilted" fused glass plate was specially made for the upcoming 2008 Lincoln Quilters' Guild, "A Quilter's Compass -- Turning freely on a Pivot" show auction.
I was especially pleased at the secondary pattern that showed up as a star in the middle!
Wednesday, April 30, 2008
Fused Glass Bracelets...

Yea!!! I had been waiting for this class to come to me for nearly a year, and finally, in March, Jayne Persico came to Michele's studio to teach her fused glass cuff bracelet class!
Above is the red, orange and yellow bracelet I whipped out in the class.
Below are the bracelets I have made since. It's such an exciting and invigorating experience to actually open the kiln at 1300 degrees Fahrenheit to work with the glass.
Above is the red, orange and yellow bracelet I whipped out in the class.
Below are the bracelets I have made since. It's such an exciting and invigorating experience to actually open the kiln at 1300 degrees Fahrenheit to work with the glass.

Jayne's developed a perfect way to measure your wrist so that the bracelets are perfectly fit to your arm. The most technical part of the process is getting the measurements right, so that the bracelet fits snugly enough so it doesn't go flying off your wrist.
I've got a few more in the works, I just need to set aside a few hours to babysit the kiln:)
I've got a few more in the works, I just need to set aside a few hours to babysit the kiln:)
Tuesday, April 15, 2008
"Rocky Road" Dip Dishes
 I am officially unveiling my newest series of dishes, the "Rocky Road" dishes.
Made up of several cut pieces of glass in browns, reds, and vanilla. This series is very time consuming to produce, but I absolutely LOVE the results!
"Meet the Baby" Shower

Yea! I finally got to meet my baby niece, Adi! We had a fabulous open house, "Meet the Baby" shower for her, where the most popular game was, "Pass the Baby!"

She's so cute, I can't stand it!!

And, of course, we had a great spread to munch on for the virgin voyage of dad's plates:)
Saturday, April 12, 2008
CGGE & EtsyBead Creative Minds for Charity!

"The Creative Glass Guild of Etsy (CGGE) and the etsyBEAD Street Team have joined forces for a creative collaboration challenge. CGGE members will create gorgeous glass cabs, beads, and pendants for etsyBEAD members to turn into beautiful pieces of finished jewelry. These pieces will then be donated to the Helping Others Street Team (HOST) in order to raise money for those fellow Etsyians in need."
And here is the entry that Jonquil of Thumbelina Creations and I will be submitting. She did such a gorgeous job of tying the piece together! I am in love with the new Key to My Heart Necklace!
Details: The short chain is 16 in. while longer chain is 18 in. The pink marbleized tumbled glass pendant with lead-free pewter key charm is the focal point of the longer chain. The center of the shorter chain carries an antique silver button and light pink glass teardrop. Various other glass beads decorate the chains, as well.
This necklace is very light and comfortable to wear. It doesn't shift around on the neck. And all the glass beads sparkle when they catch the light.
All proceeds will go to HOST...
"What is HOST?" you ask.
From their blog:
"HOST stands for Helping Others Street Team. We are a group of Etsy sellers and buyers who want to help other Etsy buyers and sellers through difficulties weather [sic] those difficulties be financial, emotional or otherwise. We will try to keep an updated list so that you can see who currently needs help. If you see someone you would like to help, please feel free to do so. The help can take many forms; praying, snagging a treasury with some of the people here featured, helping promote threads to help the listed people, buying from their stores, sending needed items to them, helping with cash donations. Sometimes someone simply needs someone to talk to during difficult times. If you are able to help someone on this list, please let one of the members know. If you would like to remain anonymous, rest assured, we will keep you anonymous, but by letting one of us know, we can keep the list accurate as to who still needs help."
Thursday, April 10, 2008
Michael Stutz - "Peplos Kore"
 "Peplos Kore" by Michael Stutz, on display at San Francisco Airport
Made from strips of shredded cardboard woven over a plywood armature and sealed with light resistant UV polymers, the detail in this sculpture is incredible. I saw this while waiting to board my flight to Nebraska. Definitely click on the picture and explore Stutz's site to find the full image. It's truly amazing!
Matt Costa - "Mr. Pitiful"
I found this new(-to-me) artist while flying home from Vegas aboard Virgin Air. Posh! I explored all of the videos on my personal entertainment system, and played a few anagram games as well:)
Viva Las Vegas!!
So, I just got back from Las Vegas, where I went for the annual Glass Expo at the South Point Casino. Not only did I see a lot of innovative materials, but I gathered a bunch of new ideas to play around with.

Among the coolest things I saw: No Days Glaze adhesives for stained glass, mosaics and fusing; Artistic Lighting Solutions, an artistic lighting option that I'm anxious to explore; and Fusing Farm glazes for turning float glass into artistic fused glass plates.
 Michele, Sharon and me on Fremont Street.
And then , there was the night life!
Honestly, we didn't party so much as we walked around to see the sights.
We checked out a couple of souvenir shops and played some slots.

I won $6.00!! High Roller!!
 Michele, Sharon and me on Fremont Street.
And then , there was the night life!
Honestly, we didn't party so much as we walked around to see the sights.
We checked out a couple of souvenir shops and played some slots.

I won $6.00!! High Roller!!

Michele and I went out on the town a couple of nights in a row. Here I am outside of Treasure Island. The show was canceled due to high winds, so we entertained ourselves:)

Oh yeah, baby! Michele was the true high roller in Vegas.
But, now it's back to normal life...almost.
I'm visiting my new niece in Nebraska, and then I'll get back to glass:)
Such the jet setter!
Subscribe to:
Posts (Atom)
LinkWithin
